Vacuum Sealing Meat That Keeps: Moisture, Bag Thickness and Sealer Type
Updated October 28, 2026
Quick answer
Vacuum sealing meat removes air from the bag, which slows oxidation and freezer burn, but it does not sterilize food or make it shelf stable: raw and cooked meat still needs refrigeration or freezing, and the USDA and FDA both treat vacuum packaging as a storage aid, not a preservation method on its own. The two things that decide whether a seal holds are surface moisture and bag choice, so pat meat dry, leave headspace, and match the bag to the machine.
Table of contents12 sections · tap to expand
Key takeaways
- Vacuum sealing slows oxidation and freezer burn but never replaces refrigeration or freezing, per USDA and FDA guidance.
- Surface moisture and grease are the leading cause of failed seals on meat, so dry the meat, leave headspace and use a moist mode or pulse control where the machine has one.
- A chamber sealer handles marinades, wet meat and liquids directly; an external suction sealer needs liquids frozen first or the bag folded over the edge.
- Bag thickness in mil and bone protection matter more for meat than for dry goods, because sharp edges and long freezer time cause punctures and surface dehydration.
- Game meat adds blood and moisture to the problem, so portion large cuts, drain well and favor a wider seal bar and stronger pump.
Our pick for this
Mesliese 100kPa Chamber Sealer
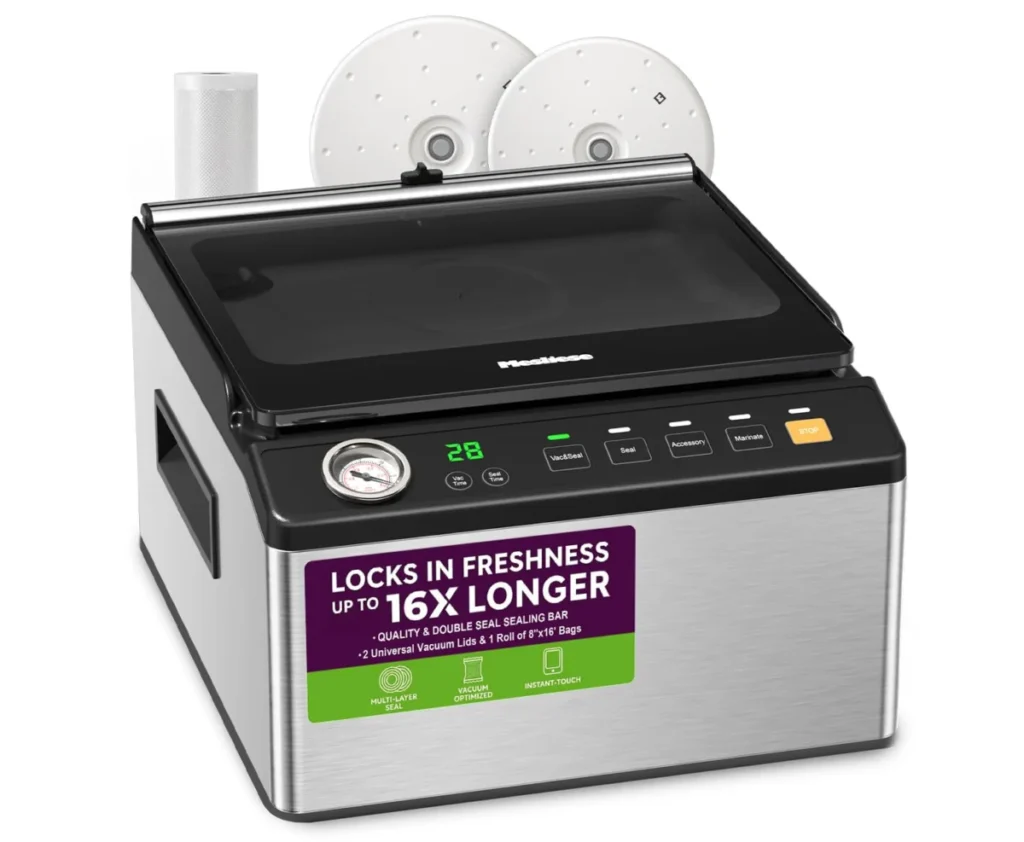
- Why we pick it: A 100 kPa chamber with a 6L interior, a detachable 11.3 inch dual sealing strip for a double heat seal, a marinate mode and compatibility with smooth pouches as well as textured rolls covers the wet-meat cases an external sealer cannot.
- Best for: Sealing marinated, wet and juicy meat without freezing the liquid first.
- Keep in mind: At 21.4 lb it is a countertop fixture rather than a cupboard machine, and the jar sealing attachment is sold separately.
As an Amazon Associate we earn from qualifying purchases. This never changes which products we recommend.
Recommended products
Products that fit this
| Product | Best for | Where to buy |
|---|---|---|
| Mesliese 100kPa Chamber Sealer | Sealing marinated, wet and juicy meat without freezing the liquid first. | Check price on Amazon |
| Avid Armor USV20 Chamber Sealer | Family-sized portions of raw, marinated or sous vide meat in a compact chamber. | Check price on Amazon |
| Avid Armor USV32 Chamber Sealer | Processing venison, fish and bulk meat in repeated cycles. | Check price on Amazon |
Does Vacuum Sealing Meat keep it fresher?
Vacuum sealing meat keeps it fresher by removing the oxygen that drives oxidation and freezer burn, but it does not make meat safe at room temperature. Oxygen is what turns fat rancid and dries the surface of frozen meat into pale, leathery patches, and pulling air out of the bag slows both. What it cannot do is stop bacterial growth, so raw and cooked meat still belongs in the refrigerator or freezer.
The USDA and FDA both treat vacuum packaging as a storage aid rather than a preservation method. Vacuum packaging can favor anaerobic bacteria if temperature control slips, which is why the USDA advises keeping vacuum packed perishables refrigerated and following its cold storage guidance rather than any calendar printed on a bag.
Freezer storage and fridge storage are different problems. In the freezer, the win is protection from freezer burn and a tighter, more compact package that stacks well; in the fridge, vacuum sealing mainly slows surface drying and cross-contamination, and buys little extra time compared with a well-wrapped cut. Treat any fridge time as short and check the USDA or FDA guidance for the specific meat.
Raw meat: how do you prepare it before sealing?
Raw meat should be patted dry, trimmed of sharp bone shards, portioned into meal-sized pieces and sealed with an inch or two of headspace at the open end. Surface moisture is the enemy: when the pump pulls, water and grease get sucked toward the seal bar, and a wet seal strip produces a channel that leaks air back in within days.
Portion before you seal. Flat, single-layer packs freeze faster, thaw evenly and stack in the freezer, while a thick lump of ground beef takes far longer to chill through. Flatten ground beef in the bag before sealing, and keep pieces of similar thickness together so they freeze at the same rate.
If the machine has a moist mode or a pulse function, use it for raw meat. Moist mode extends the vacuum and seal timing to drive out residual vapor, and pulse lets you stop the pull before juices reach the seal bar. A removable drip tray helps on external sealers, but it does not rescue a bag edge that is already wet.
Bone is the other preparation issue. Trim or cover sharp bone ends, or double-bag the piece, because a point that presses against the film in the freezer will puncture it and let air in. The same applies to rib bones and to the cut ends of venison.
- Pat the meat dry with paper towels and trim loose fat and sharp bone.
- Cut into meal-sized portions of even thickness and flatten ground meat.
- Slide the meat into the bag and wipe the inside of the opening dry.
- Leave 1 to 2 inches of headspace below the seal line.
- Select moist mode or pulse if available, then seal and check the seam for wrinkles or moisture.
Want to skip the research? The Mesliese 100kPa Chamber Sealer is the model we would start with.
Can you vacuum seal meat with marinade or seasoning?
You can vacuum seal meat with marinade or seasoning, but how you do it depends on the sealer type. A chamber vacuum sealer places the whole bag inside a chamber and equalizes pressure around it, so liquids stay put and a wet marinade seals cleanly. An external suction sealer pulls air from the open end of the bag, so any free liquid travels toward the seal bar and can ruin the seam.
With an external sealer, either freeze the marinade or the marinated meat first until it is firm, or hang the bag over the counter edge with the opening folded upward so liquid stays below the seal line while the air leaves. Both techniques work, and both add a step. Seasoning rubs are easier because they are dry, but a wet paste behaves like a marinade.
Vacuum sealing also speeds marinating, because pressure changes help liquid move into the meat. A chamber machine with a marinate mode can shorten the process considerably, which is why cooks who marinate often justify the chamber machine on that feature alone. Keep marinated meat refrigerated during the process, never on the counter.
Which sealer type handles the meat you cook?
A chamber vacuum sealer handles wet, raw and marinated meat with the least fuss, an external suction sealer suits dry raw cuts and portioned freezer packs, and a handheld sealer is for light jobs like zipper bags and jar lids rather than bulk meat. The choice usually comes down to how often liquid is involved and how much you want to spend on bags over time.
External suction sealers are compact and inexpensive, and they need embossed channel bags so air can travel out of the bag. They struggle with marinades and juicy cuts unless you freeze first, and their pumps are rated for intermittent use, so a long processing session needs rest between seals. For a household portioning supermarket meat, that tradeoff is often acceptable.
Chamber sealers use smooth chamber pouches, which cost less per bag, and their pumps are built for heavier duty. They are also heavy and take up counter space.
The Mesliese 100kPa chamber sealer is a compact example: a 6L chamber measuring 12.3 by 10.4 by 3.2 inches, 100 kPa of vacuum pressure, a detachable 11.3 inch dual sealing strip for a double heat seal, and a 21.4 lb body. It also accepts textured and embossed rolls, so you are not locked into one bag style, and its marinate mode is aimed exactly at the wet-meat problem.
The Avid Armor USV20 takes a different approach to the same job: a 4L stainless chamber, a 300 W pump, an 11.5 inch heating bar and adjustable vacuum time from 15 to 60 seconds, in a 17.3 lb frame. Its smaller chamber suits family portions rather than whole primals, and its smooth pouches are specified up to 11 by 10 inches, which is worth checking against the cuts you buy.
The Avid Armor USV32 sits above it with a 380 W pump, a heavy-duty 11.5 inch dual-wire sealing bar, a stainless chamber, an accessory port for jars and a 26.4 lb build for higher volume.
Choose a chamber model if you seal marinades, stews, wet game or sous vide portions regularly and want cheap smooth pouches. Choose an external suction sealer if your meat is mostly dry, portioned and destined for the freezer, and you value a small footprint over liquid handling. A handheld sealer is a supplement for jars and zipper bags, not a replacement for either.
Helpful tool
Avid Armor USV20 Chamber Sealer
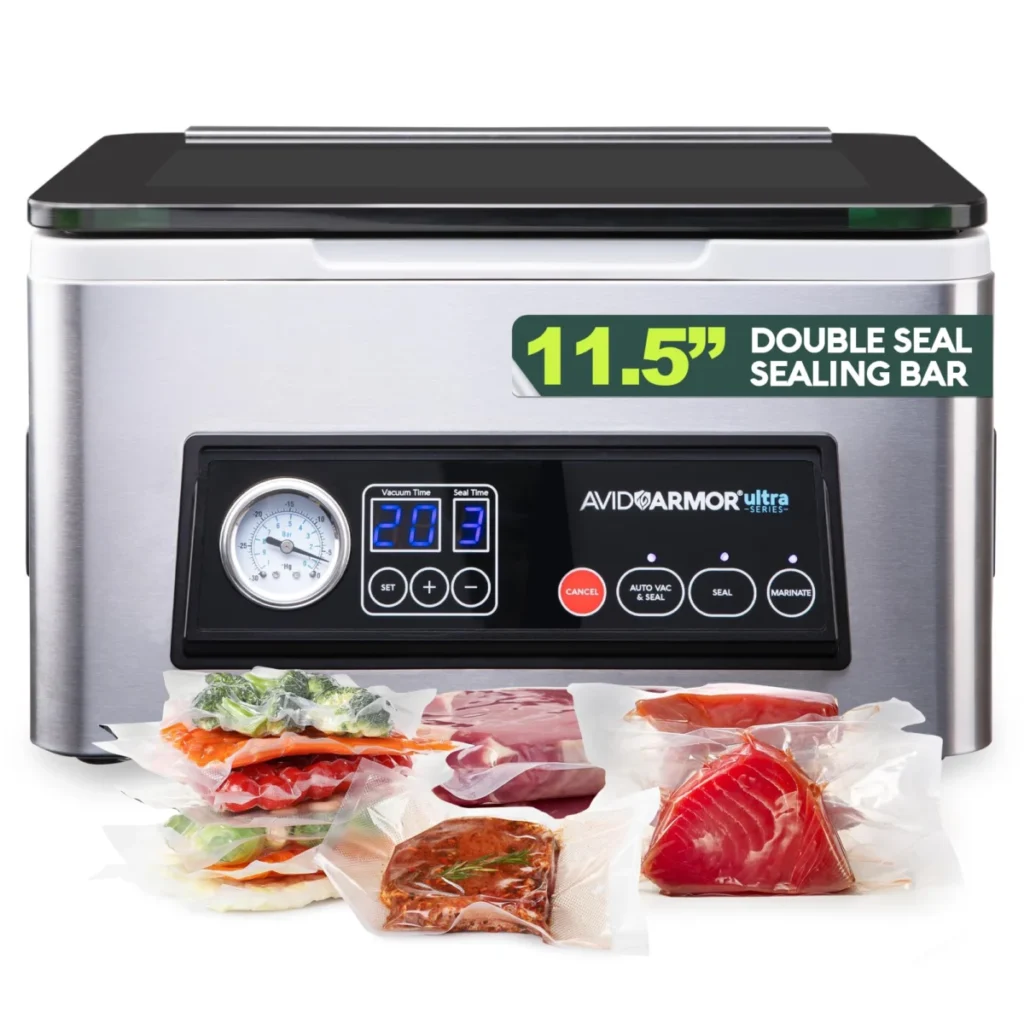
- Helps with: Family-sized portions of raw, marinated or sous vide meat in a compact chamber.
- Why it fits: A 4L stainless chamber, 300 W pump, 11.5 inch heating bar and adjustable vacuum time from 15 to 60 seconds give control over delicate and wet pieces, and the user-replaceable seal bar keeps long-term costs down.
- Keep in mind: The chamber and its smooth pouches are sized for smaller portions, so whole primals and very large cuts will not fit.
Which bags and rolls should you use for meat?
Use embossed channel bags or rolls in an external suction sealer and smooth chamber pouches in a chamber sealer; the bag type has to match the machine, or the vacuum will not draw. Channel bags have a textured network that keeps air passages open as the bag collapses, while smooth pouches rely on the chamber to remove air from around the whole package.
Thickness matters more for meat than for pantry goods. Thin film punctures on bone and abrades against other frozen packages, and a pinhole lets air in to cause freezer burn. Thicker film, commonly 3 mil and up for freezer and sous vide use, resists both, though very thick bags can be harder for a low-power sealer to close cleanly. Check that the bag is rated freezer safe and, if you cook sous vide, that it is rated for the water bath.
Rolls versus precut bags is a cost and convenience decision. Rolls let you cut exactly the length a brisket or a whole tenderloin needs and usually cost less per inch, while precut bags are faster for repetitive portions like chicken breasts or ground beef patties. Whichever you choose, size the bag so the meat sits flat with room at the open end for the seal bar.
For bone-in cuts, double-bag or wrap the bone in a folded piece of the same film before sealing. For game, the same rule applies with more force: a shoulder or shank with exposed bone will punch through a single layer in a chest freezer.
How should vacuum sealed meat be stored and thawed?
Store vacuum sealed raw meat in the freezer or the coldest part of the refrigerator, label each pack with the contents and the date, and thaw it in the refrigerator, never on the counter. Vacuum packaging does not change the basic cold-chain rules the USDA sets out, and a sealed bag of meat left at room temperature is still a food safety risk.
Labeling is the practical habit that makes a freezer work. Write the cut, the date and any marinade on the bag with a freezer marker before it goes in, because vacuum sealed packs all look alike once frost forms. Keep the freezer at 0 F or below as the USDA recommends, and rotate older packs to the front.
Storage time varies with the cut, the fat content, the freezer temperature and the bag, so no single number applies across beef, pork, poultry and fish. Follow USDA or FDA guidance for the meat you have rather than a figure from a bag box, and discard anything with an off smell, slime or a broken seal after thawing.
Sous vide cooking from frozen works well with vacuum sealed meat because the bag goes straight into the water bath, and a double heat seal gives more margin against a seam failure during a long cook. Make sure the bag is rated for sous vide temperatures and that the seal is clean and wrinkle-free before the water goes on.
Game meat: what changes for venison and fish?
Game meat brings more blood, more moisture and more irregular shapes to the sealer than supermarket cuts, so draining, portioning and a stronger machine matter more than they do for a chicken breast. Venison and fish both release liquid as they rest, and that liquid is what reaches the seal bar first.
Drain and blot game thoroughly, and consider a short chill so surface fluids firm up before sealing. Portion large cuts into steaks and roasts that fit the bag flat, and keep the backstraps and loins separate from the trim you will grind. Fish benefits from being patted dry and, for oily species, from a thicker bag that resists abrasion in the freezer.
For hunters processing a whole deer or a season of fish, a chamber sealer with a wider seal bar and a heavier pump earns its space. The Avid Armor USV32 pairs a 380 W pump with an 11.5 inch dual-wire sealing bar and a stainless chamber, which suits repeated cycles on wet, irregular pieces, and its accessory port adds jar sealing for dry goods and rubs. The tradeoff is a 26.4 lb machine that wants a permanent counter spot.
A big game vacuum sealer does not have to be a chamber model, but if you are sealing blood-rich trim and marinades, the external sealer's freeze-first workaround adds real time to a long processing day. Match the machine to the volume you actually bring home, not to the one big season.
Helpful tool
Avid Armor USV32 Chamber Sealer
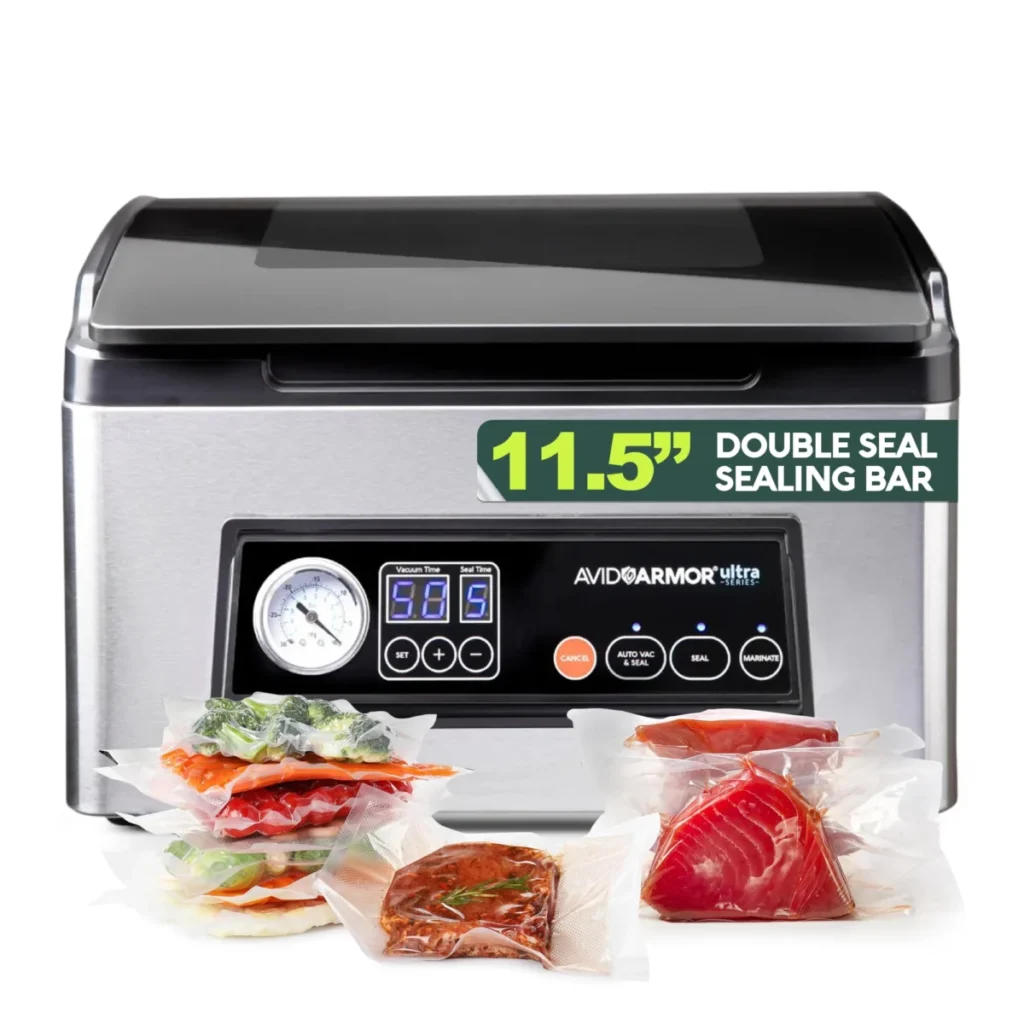
- Helps with: Processing venison, fish and bulk meat in repeated cycles.
- Why it fits: A 380 W pump, heavy-duty 11.5 inch dual-wire sealing bar, stainless chamber and accessory port suit wet, irregular game cuts and higher volume, with a one-touch automatic cycle for consistency.
- Keep in mind: At 26.4 lb it is the heaviest option here and needs dedicated counter space.
Why is my sealer failing on meat?
Most sealer failures on meat start with moisture or grease in the seal area, followed by a wrinkled bag, an overfilled bag, a worn gasket and finally a weak pump. Work through them in that order before assuming the machine is broken.
Moisture and grease are first because they are the most common and the easiest to fix. Wipe the inside of the bag opening, refold the bag so the seal area is flat, and use moist mode or pulse if the machine offers it. A seal that looks cloudy or has a visible channel will leak, so cut below it and reseal.
A wrinkled or contaminated seal area is next. Any crease across the seal line, or a crumb of seasoning trapped in it, creates a path for air. Smooth the bag flat before closing the lid and keep the meat below the seal line with headspace to spare.
If the bag collapses but air returns later, suspect the gasket or the pump. A gasket that is dirty, dry or cracked will not hold vacuum, and cleaning or replacing it is a normal maintenance step. A pump that sounds labored or cannot pull a bag flat points to a failing machine, especially on an older external sealer that has run many cycles.
Replace the part when the gasket or seal bar is visibly worn, and replace the machine when the pump no longer reaches vacuum even with a clean, dry bag and a fresh gasket. On chamber models with a user-replaceable seal bar, such as the Avid Armor USV20, that repair is inexpensive and worth doing before shopping for a new unit.
- Wipe the bag opening dry and check for grease.
- Flatten the seal area and remove wrinkles or trapped crumbs.
- Reduce the fill level to leave 1 to 2 inches of headspace.
- Clean or replace the lid gasket.
- Test the pump with an empty bag; if it still will not pull, service or replace the machine.
Avoid these
Common mistakes to avoid
- Sealing raw meat while it is still wet from the package or a marinade. Pat it dry, wipe the inside of the bag opening, and use moist mode or pulse so liquid does not reach the seal bar.
- Using smooth chamber pouches in an external suction sealer, or channel bags in a chamber machine without checking compatibility. Match the bag to the machine: embossed channel bags for external sealers, smooth pouches for chamber sealers, and confirm any roll compatibility in the specifications.
- Leaving sharp bone exposed against a single layer of film. Trim the bone, wrap it in a folded piece of film, or double-bag bone-in cuts before freezing.
- Treating a vacuum sealed bag of meat as shelf stable or as a substitute for refrigeration and freezing. Keep raw and cooked meat refrigerated or frozen and follow USDA or FDA cold storage guidance; vacuum packaging is a storage aid, not a preservation method.
- Overfilling the bag so the meat crosses the seal line. Portion to leave 1 to 2 inches of headspace and keep the meat flat and below the seal area.
As an Amazon Associate we earn from qualifying purchases. This never changes which products we recommend.
Common questions
Frequently asked questions
Is vacuum sealed meat safe in the fridge?
Yes, provided it stays refrigerated at or below 40 F and you follow USDA or FDA guidance for the specific meat. Vacuum packaging slows oxidation and surface drying but does not stop bacterial growth, so treat fridge time as short and check the meat before cooking.
How long does vacuum sealed meat last in the freezer?
Storage time varies with the cut, fat content, freezer temperature and bag thickness, so there is no single number. Keep the freezer at 0 F or below as the USDA recommends, label each pack with a date, and use USDA or FDA guidance rather than a figure from a bag box.
Is vacuum sealed meat safe if it sat out overnight?
No. Perishable meat left at room temperature overnight should be discarded, because vacuum packaging does not prevent bacterial growth and can favor anaerobic bacteria. Follow USDA or FDA guidance on discarding food left out of refrigeration.
Next step
Start by deciding whether liquid is part of your meat routine: if you marinate, seal wet game or cook sous vide, a chamber sealer such as the Mesliese 100kPa model solves the moisture problem directly, while the Avid Armor USV20 is the smaller, lower-volume chamber option and the USV32 is the heavier-duty choice for hunters and high volume.
Keep reading
Vacuum Sealing Fish and Seafood: Prep First, Then Seal
A clear, practical answer to vacuum sealing fish and seafood, with the steps, the common mistakes and what to do next.
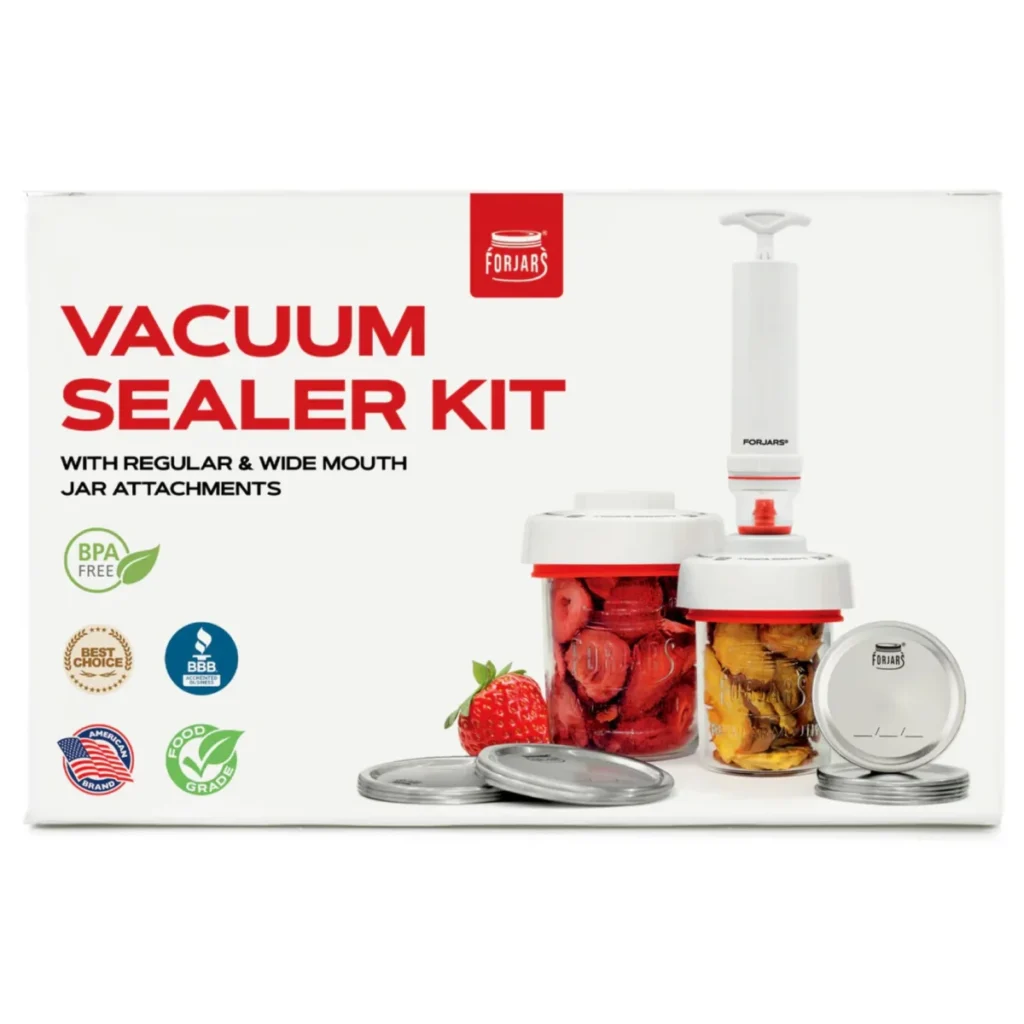
Handheld Mason Jar Vacuum Sealers: Which Pump Fits Your Lids and Food
The FORJARS Jar Vacuum Sealer Set is our top pick among 7 handheld mason jar vacuum sealer, compared on sealer type and…
Avid Armor USV20 Review: A Chamber Sealer Built for Liquids, Capped at 11×10 Pouches
The Avid Armor USV20 suits frequent liquid and game sealing on a spare counter stretch. Bulk batches and wide cuts need a…